
Starting a broadcast
Before your first broadcast
Select the correct project, add channels and check the active restream plan. If enabling a channel prompts you to select or upgrade a plan, first check the stated reason: no active plan, the channel limit or an unavailable “Another RTMP server” connection.
The Start broadcasting button in the empty panel opens this guide. The broadcast itself starts after connecting your source software and enabling the required channels.
Connect your broadcasting software
Open Home and select RTMP & Key. This page contains the ingest server addresses and stream key for the selected project.
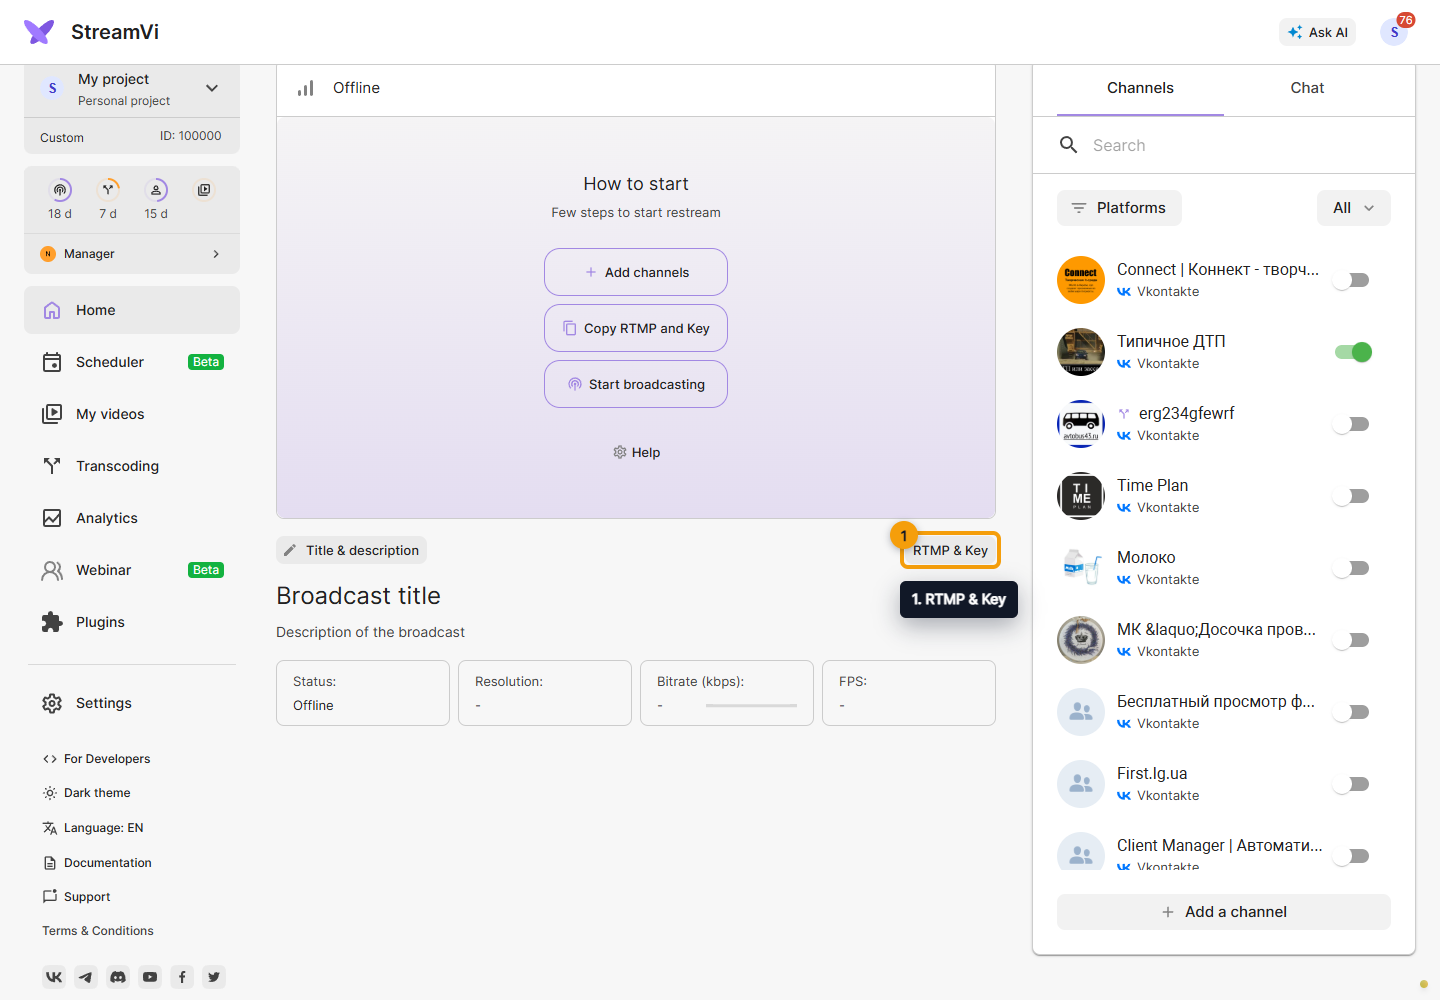
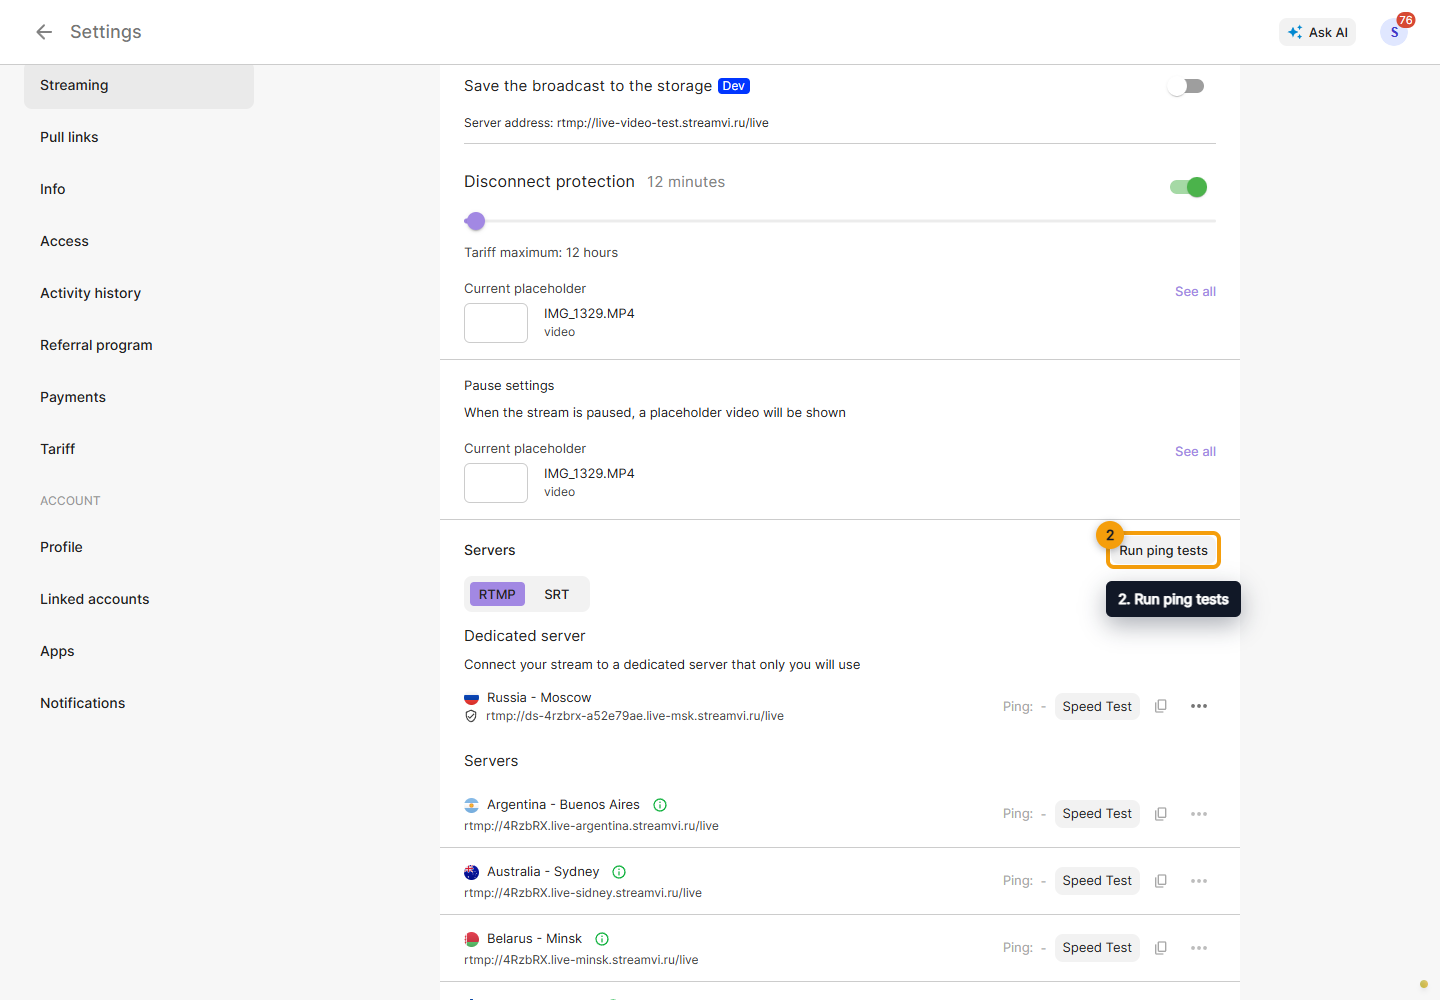
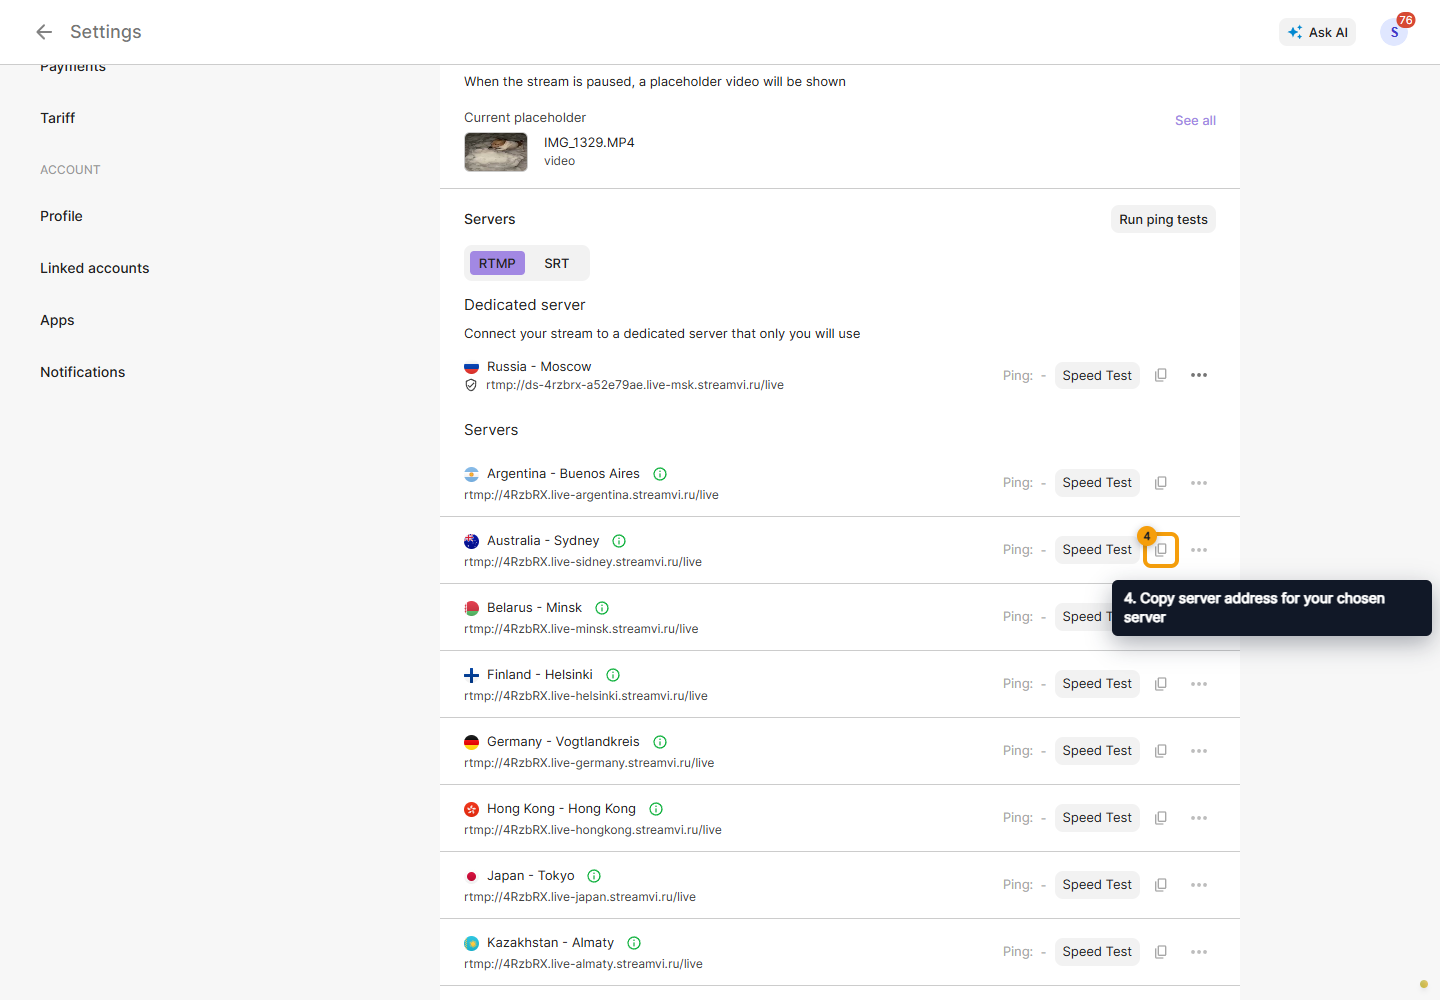
Select Run ping tests to compare latency to the available servers. A lower ping means a shorter response delay; check video upload speed separately.
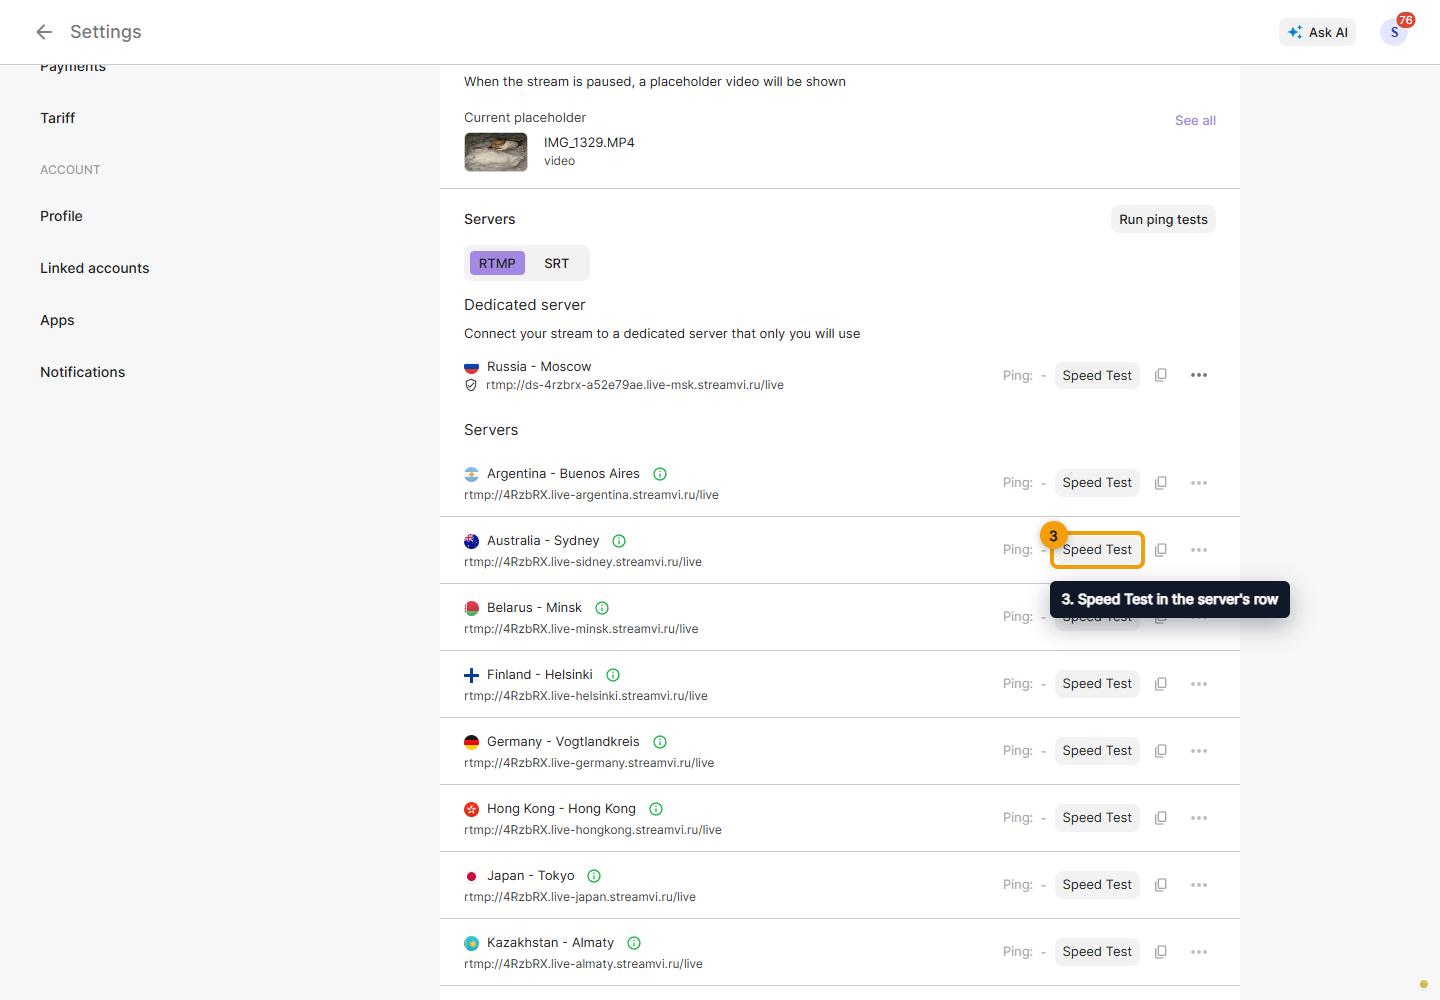
For a detailed check, select Speed Test in the server's row. Speed and latency can change with network load.
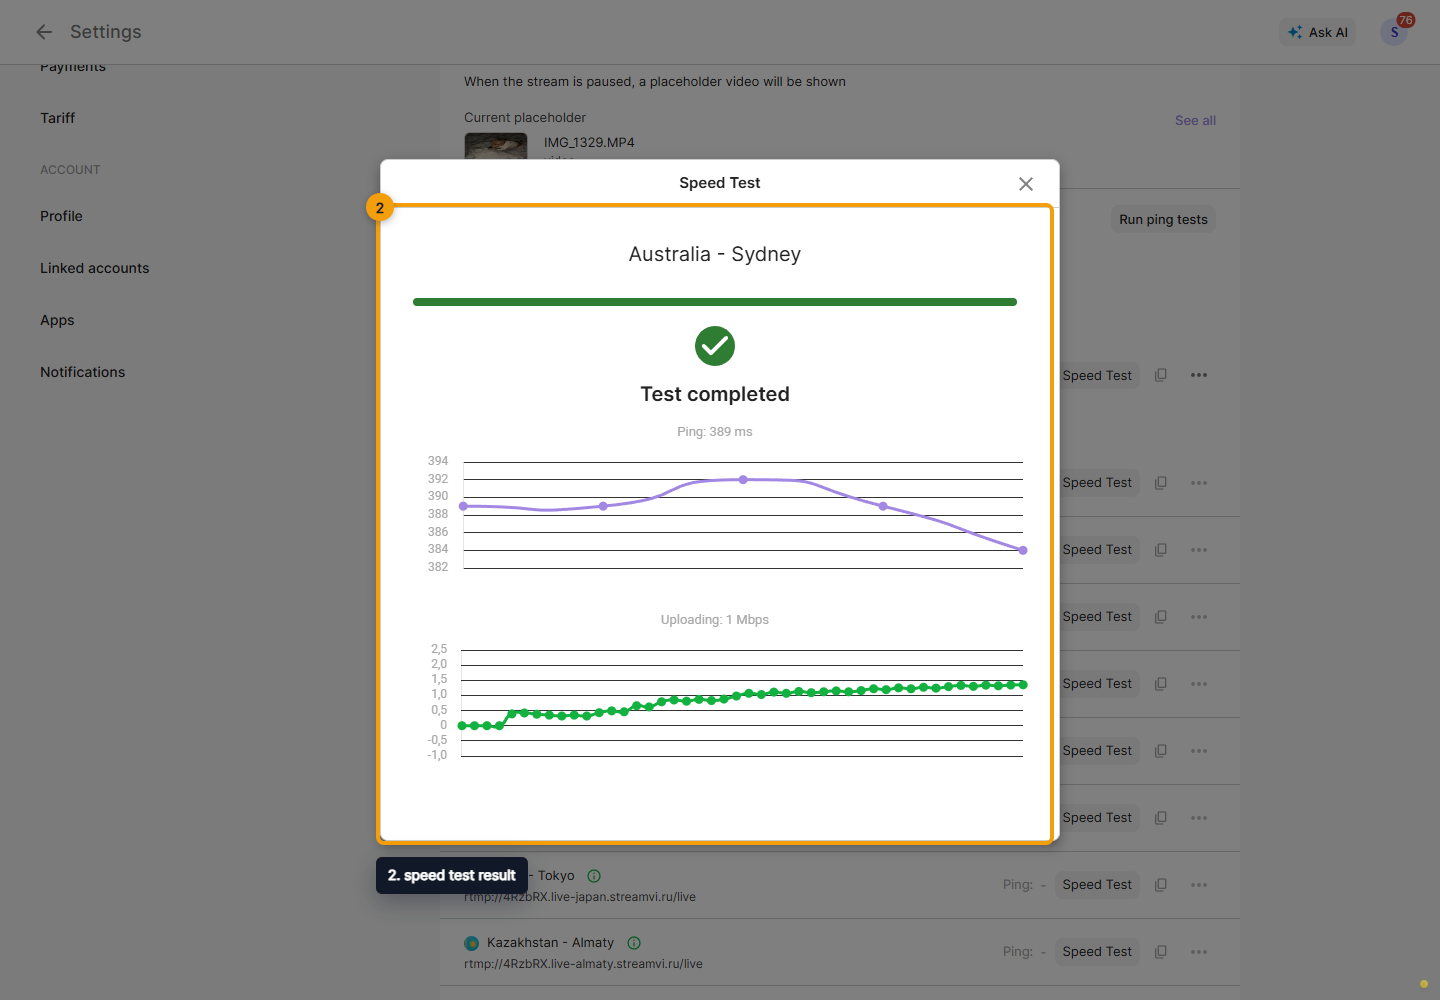
Wait for the test to finish. The speed test result shows latency and the upload speed to the server. Use the graph to estimate a stable upload speed and set the broadcast bitrate below it, leaving room for fluctuations.
Choose RTMP or SRT from the server list according to your software's support. Select Copy server address for your chosen server and paste the address into your broadcasting software.
Select Copy next to the stream key and paste the key into the same software. You do not need to reveal the key or send it in chat.
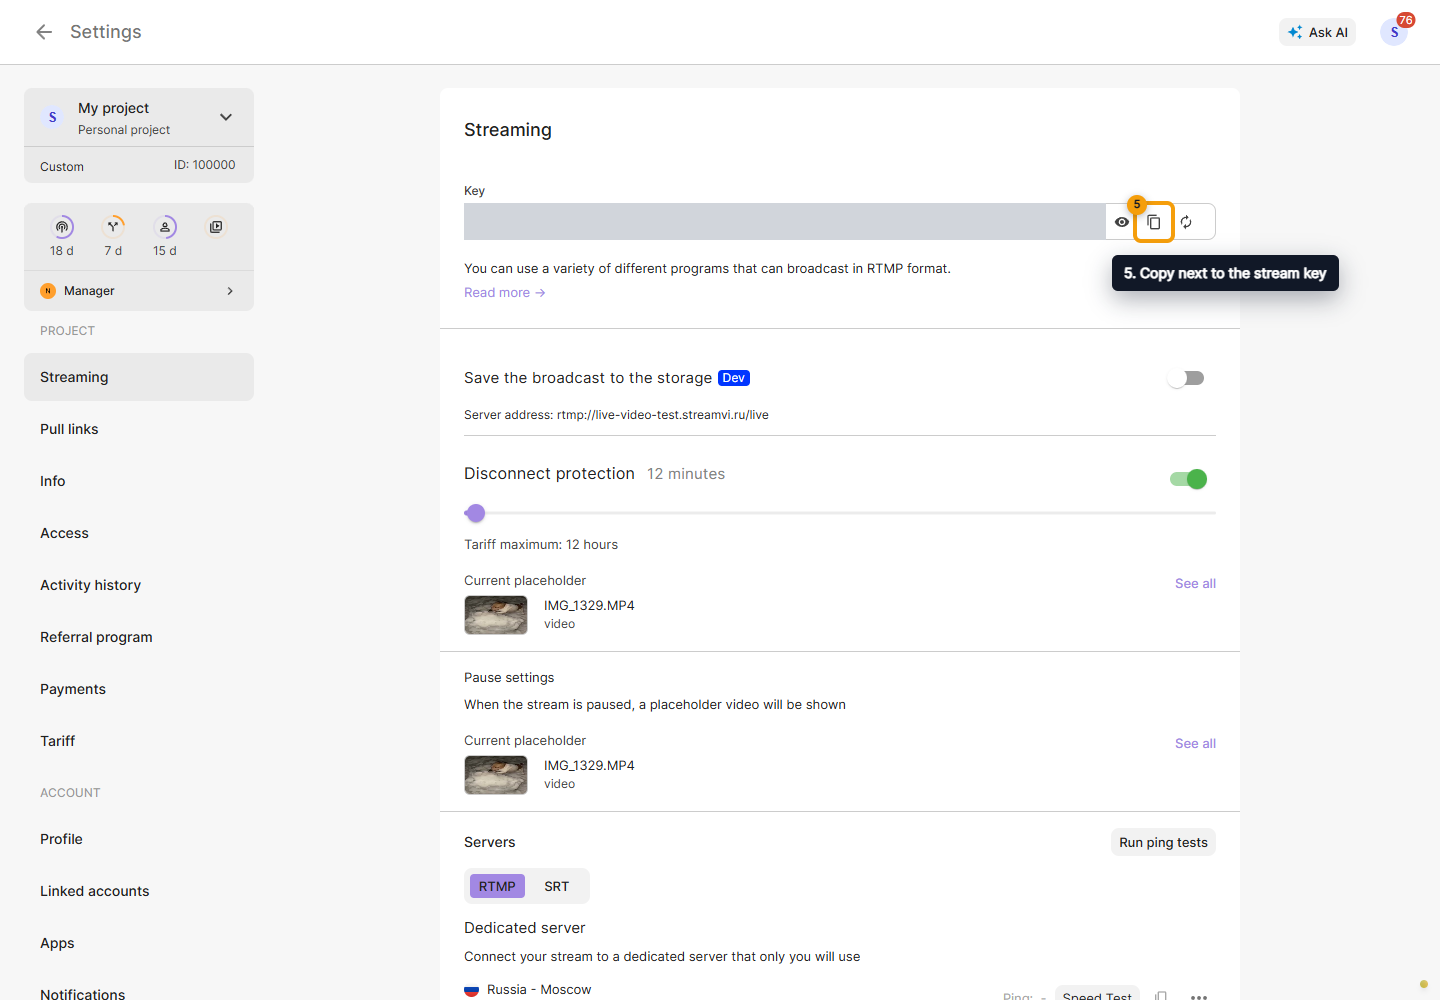
When switching to another user or project, update the server address and stream key in your broadcasting software.
Next, choose and configure your broadcasting software.
Verify and end the broadcast
Return to the project's main page and enable the required channel switches. Check their settings, valid platform access and any selected scheduled event. Then start sending from OBS or your prepared source. Opening RTMP settings and copying a key do not start a broadcast by themselves.
Wait for incoming video in StreamVi's status panel, then check picture and sound on every destination platform. If an event requires a manual start on the platform, perform it there. If StreamVi receives video but one channel does not, check that channel and the analytics log.
In the Information tab, check the incoming stream's status, resolution, bitrate and FPS. The example below uses demo data to show the panel after a source connects. Preview playback has not been started; this example checks the incoming stream parameters.
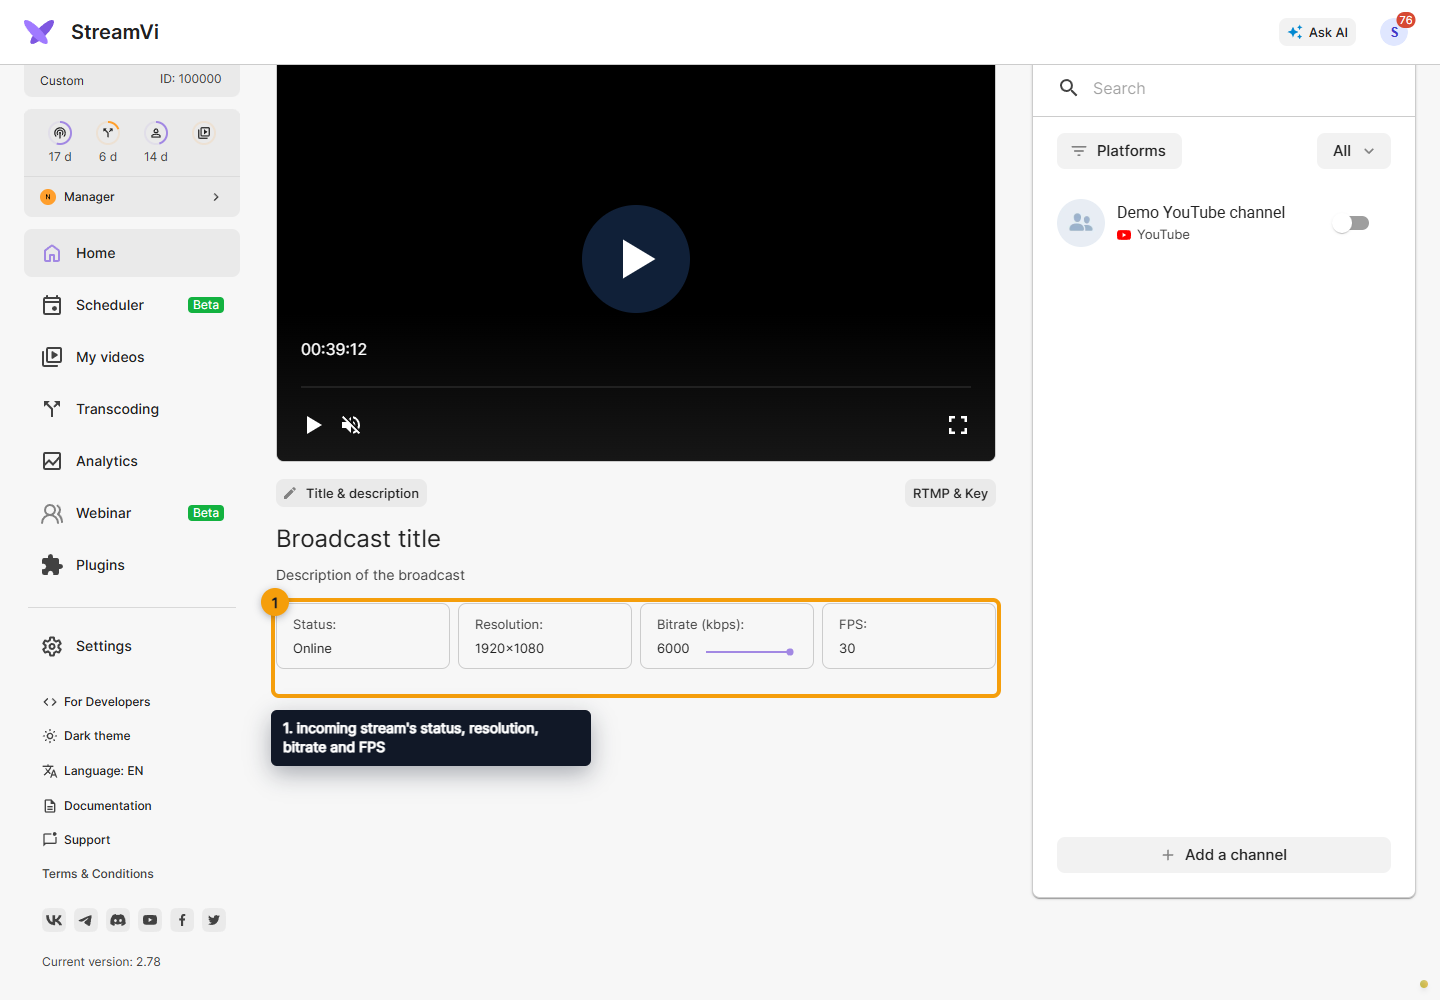
On a narrow screen, switch between Information, Channels and Chat. The input status and preview help you check the source; verify delivery to each destination separately.
For normal shutdown, stop transmission in the source program and check both the Cabinet and destination platforms. With disconnect protection, StreamVi may wait for reconnection while showing a placeholder; use the available stop action if you will not resume. Manual pause immediately replaces video with a placeholder temporarily.
For files, use the scheduler; for a browser room, see Webinars.
If no incoming stream appears
Check that OBS or the other source program is actually sending: an open preview alone is not enough. Its settings must use the ingest server address and stream key for the current project, available under RTMP and Key. Compare them using the steps above, especially after switching projects or devices.
If the source reports a connection error, check network access and run a speed test for the selected server. If StreamVi shows incoming stream parameters but one destination has no picture, check that channel.
End a broadcast from the Cabinet and start again
For a stream from OBS or another encoder, select Finish in the top panel.
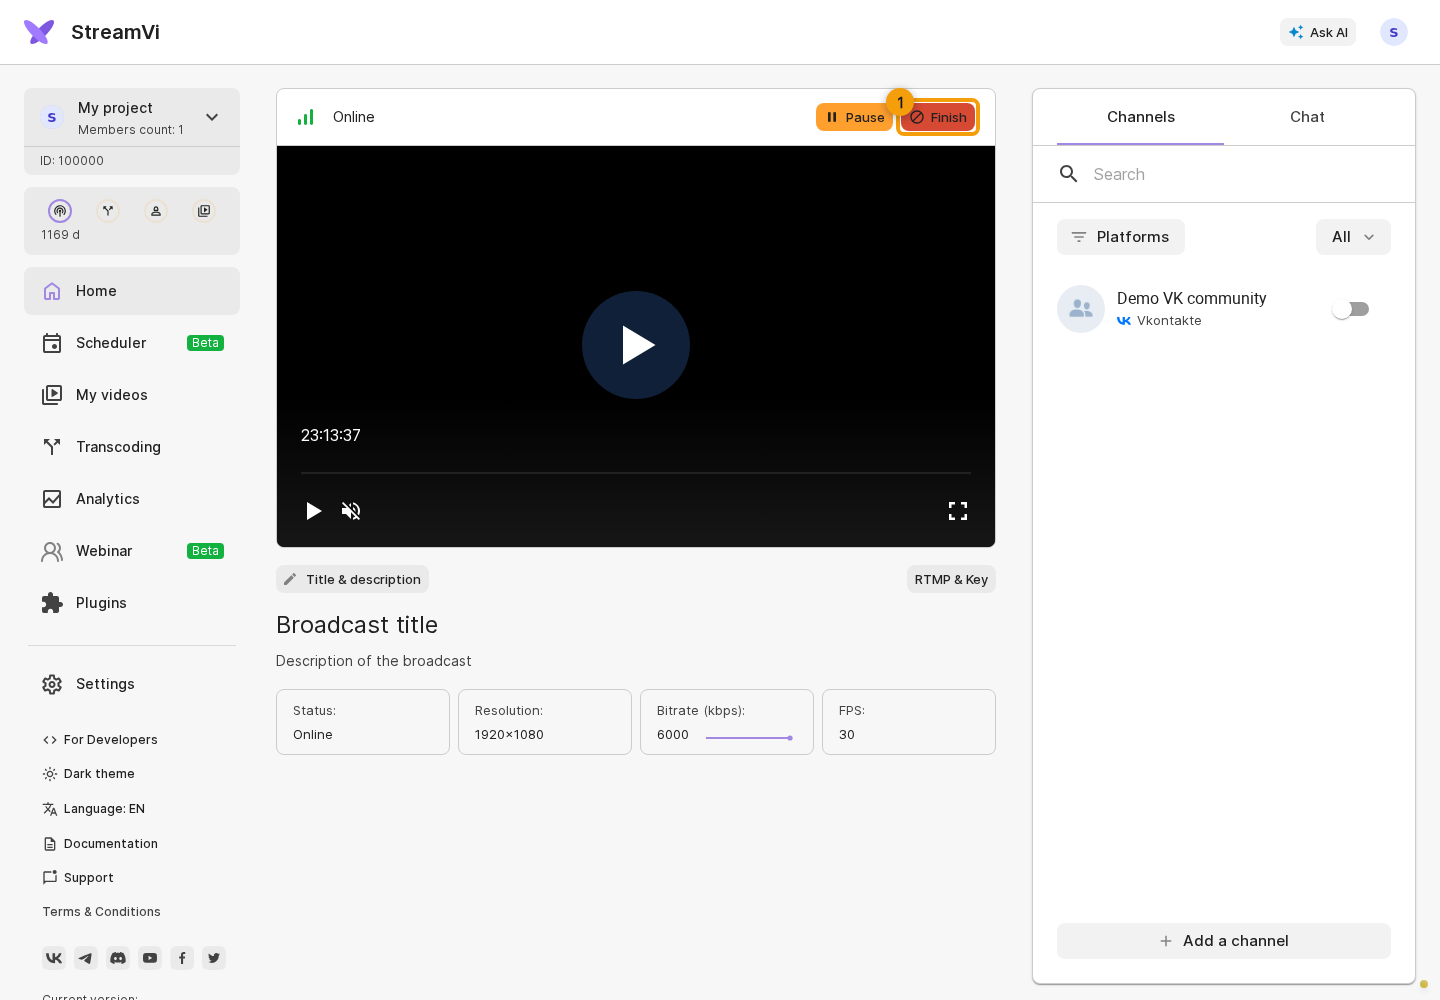
Read the warning in the confirmation dialog: broadcasts on all channels in the current broadcast will end. Select Yes to end the broadcast or No to return without stopping it. To disconnect just one destination, close the dialog and use that channel's switch.
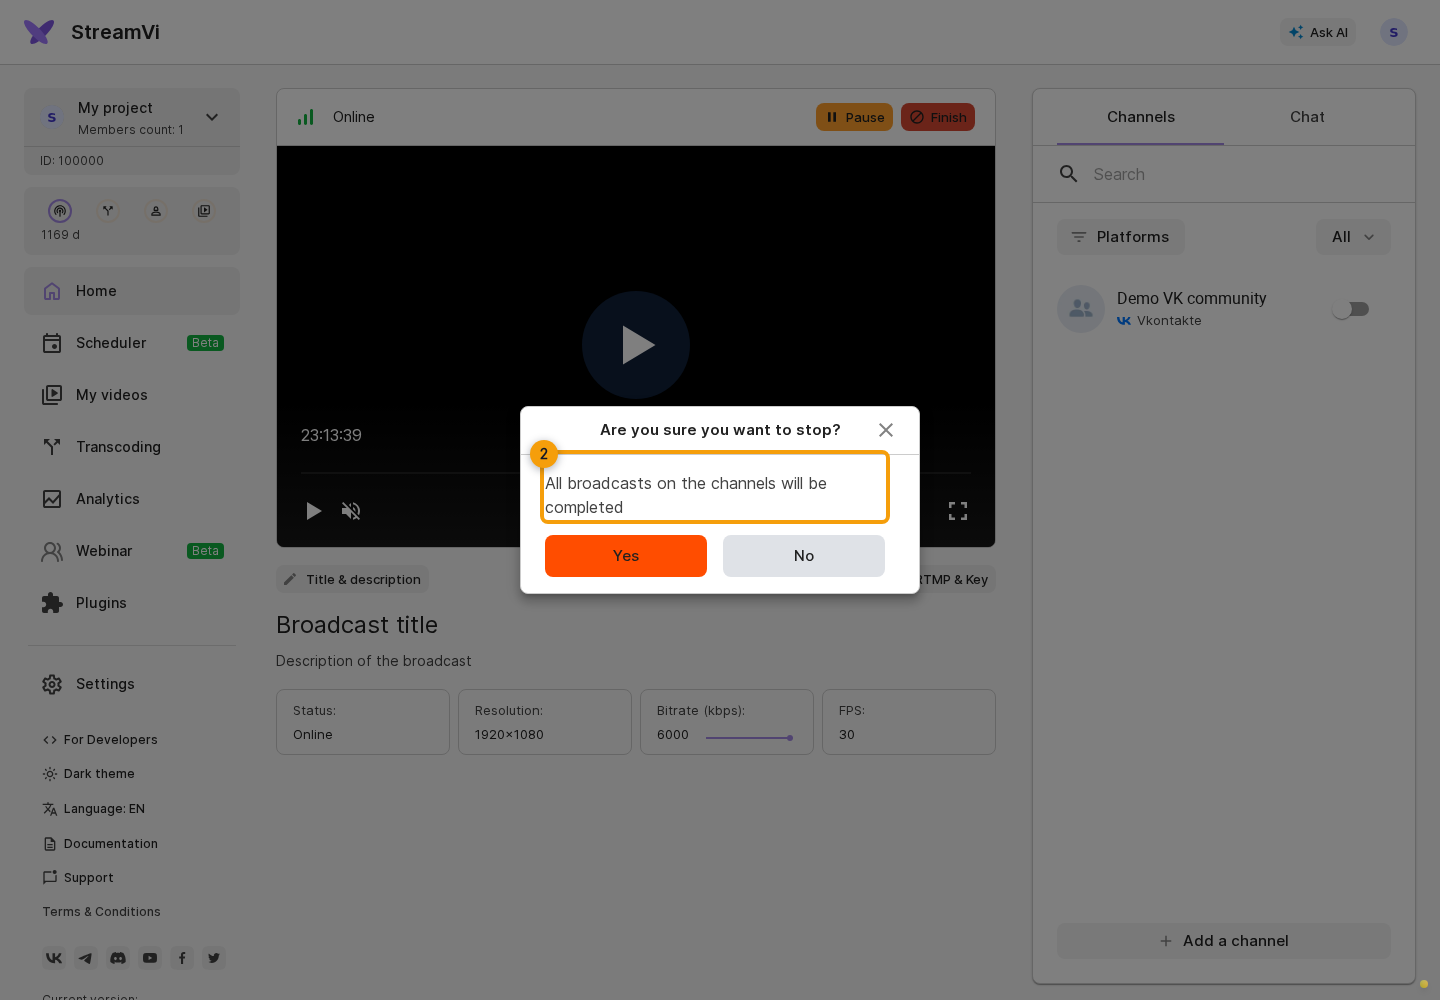
The screenshots show the interface with demo data.
After a successful stop, The broadcast has been stopped appears. If the panel then shows Stream stopped, stop sending from OBS and start it again to begin a new broadcast: the Cabinet's help text requires reconnecting the source. For a temporary break with a placeholder, use Pause → Continue broadcasting.
Before switching software or devices, stop sending from the previous source, check the selected project's address and key in the new source, and connect it. Check the incoming stream and every destination again. With disconnect protection, account for the configured waiting period; it does not guarantee that an external platform will keep the event open.